LeanDESIGNER installation (Cloud database)
This article describes the LeanDESIGNER installation, both server and client side, with database on cloud. It applies for LeanDESIGNER 1.0.20 or higher. For previous versions, please contact Hyperlean support.
1. Introduction
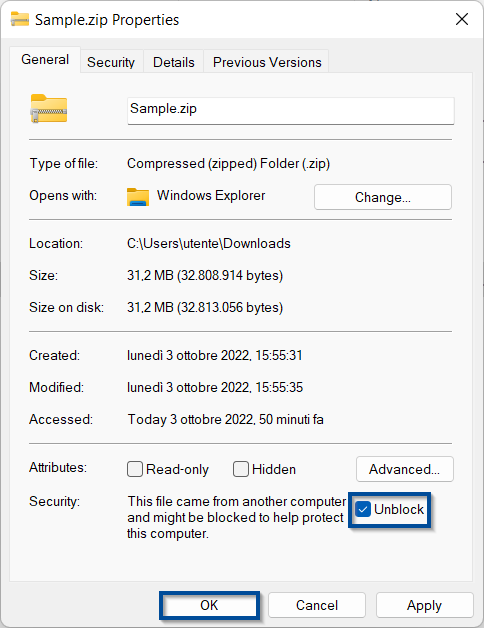
To install LeanDESIGNER you’ll need to download some files from a few links: you shall check for each “.zip” file you download that it does not have a security block and eventually disable it, by applying the following procedure:
- Right-click with the mouse on the downloaded “.zip” file
- Select “Properties” option in the context menu which will open and then go to the tab named “General”.
If the “.zip” file is blocked, you will see the button or the box “Unblock”. In this case:
- Press “Unblock” button or tick “Unblock”.
- Press “Ok” to save the changes.
2. Server-side configuration
Server-side, there are two main topics to highlight:
- License installation
- Creation of a shared folder containing the installation material
The shared folder can be created in the same server where LeanDESIGNER license is installed or in a different one.
2.1 License installation
First, you need to install the driver to manage the license by following next procedure:
- Download “LicenseDriverInstallation_8.41.zip” from Dropbox.
- Unzip the downloaded “.zip” file. The folder “LicenseDriverInstallation_8.41”, obtained from the unzip, contains the following 4 files:

- Run as administrator the file “InstallLicenseDriver.bat” (right-click à “Run as administrator”) to install the license manager driver.
- Check if the service Sentinel LDK License Manager is running, otherwise start it. To check it: write “Services” on Windows search bar.

Go to folder “LicenseDriverInstallation_8.41” and:
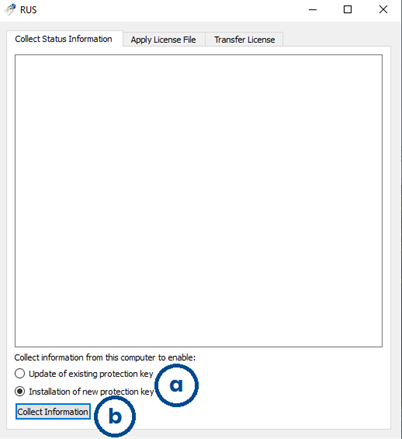
- Double-click on “RUS_GEWKM.exe” to run it
- In the “Collect status information” tab
- Select “Installation of new protection key”
- Click on “Collect information” button
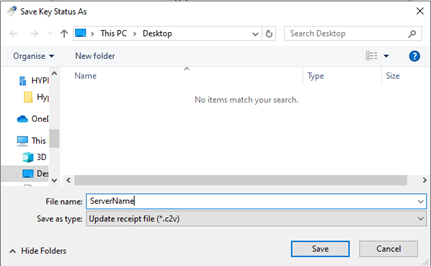
Save the related “C2V” file (fingerprint) with the name of your server.
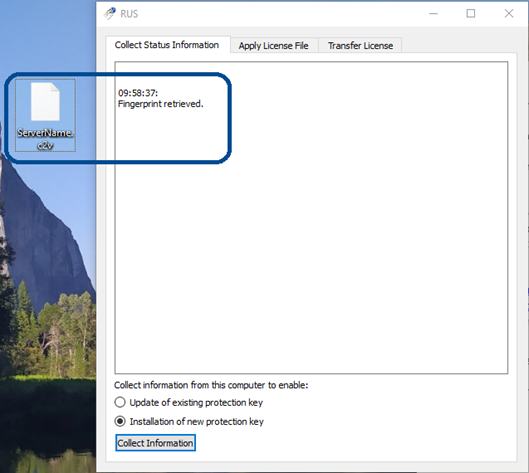
Send the fingerprint file by email to support@hyperlean.eu.
NOTE: “C2V” files do not contain private customer information. They contain information about the license terms and data stored in deployed Sentinel protection keys. For further information, please visit the provider’s webpage.
Hyperlean Support will send you back a “V2C” file that allows you to activate the license. To apply the file run “RUS_GEWKM.exe” then follow next steps (shown on next images):
- Select “Apply License File” tab
- Click the three points button to upload the “.v2c” file received by Hyperlean Support
- Click on “Open” button to open it
- Click on “Apply Update” button
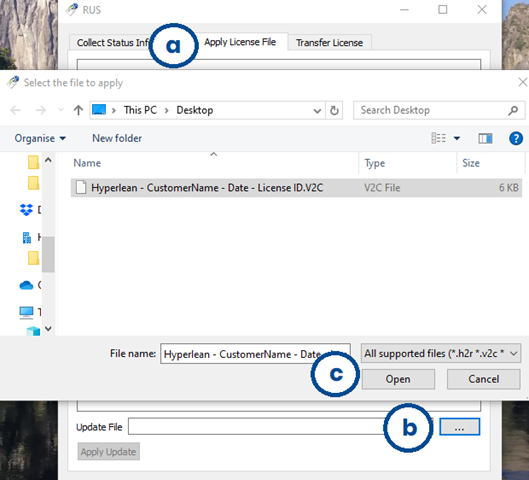
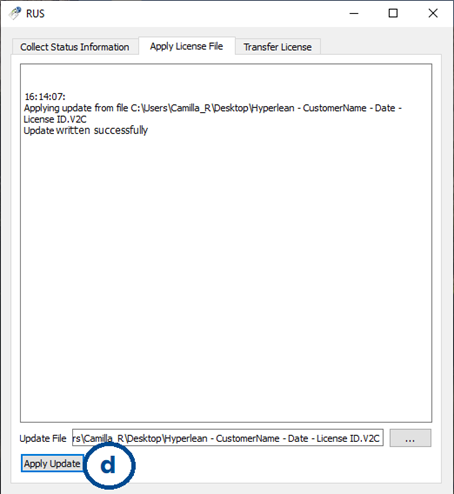
Open a browser and go to http://localhost:1947/int/devices.html to check if the license has been installed. If so, you will see a line like the one in the next picture.

2.2 Creation of a shared folder
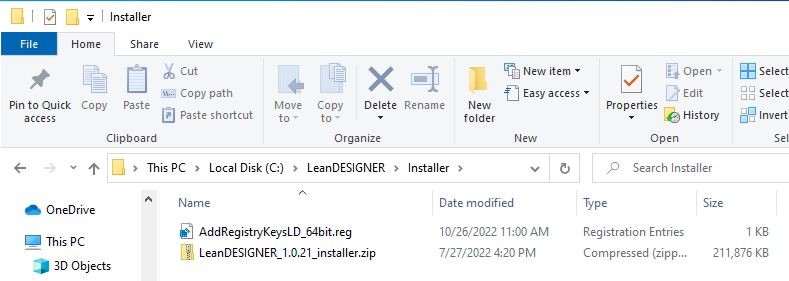
The first step is to create a shared folder called “LeanDESIGNER” with read permissions for all LeanDESIGNER users. Inside this folder, create the following subfolders:
- “Installer”: copy here the installation package and the registry file “AddRegistryKeysLD_64bit.reg”
- “Documentation”: save here the guides sent by Hyperlean
Now you can install LeanDESIGENER on each client machine by following the procedure described on the next chapter.
3. Client-side installation
Log in to a client with a user with administrator permission.
Open the shared “…\LeanDESIGENER\Installer” folder, copy the “AddRegistryKeysLD_64bit.reg” file and paste it in your desktop: it contains the crypted string to enable the connection to the database on cloud.

If you have any firewall restrictions, it may be necessary to open the port 25034 that is the port used for the remote connection to our cloud server.
Please inform support@hyperlean.eu if you wish to use a different port.
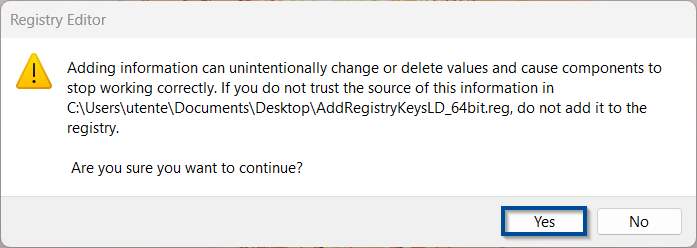
Press right mouse button on the “AddRegistryKeys_64bit.reg” file that you pasted in your desktop and click on “Merge”.

Press “Yes” and “Ok” on the next two windows that will open.

Open the shared “…\LeanDESIGENER\Installer” folder and and temporarily paste the unzipped installer package on your desktop.
At the end of the installation, whether successful, you can delete it.
Run “Setup.exe” to install LeanDESIGENER (by double clicking with the mouse or from command line). The LeanDESIGENER setup process will automatically start.

In every machine where LeanDESIGENER is installed for the first time, some prerequisites will be automatically installed.
Click “Install” to accept the installation of the necessary prerequisites.
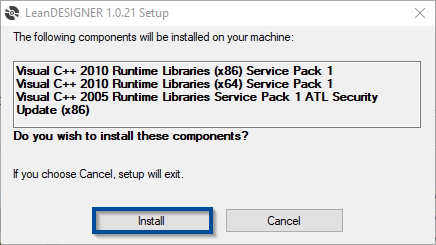
Next pictures show the installation progress.
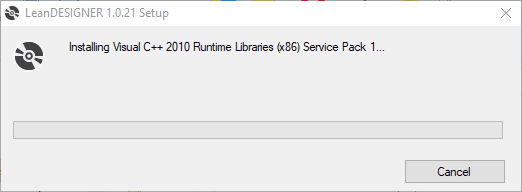
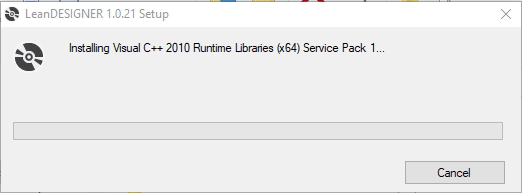
The installation of the prerequisites is not always necessary: if a previous release of LeanDESIGENER had been installed on that client, they will not be installed again.
After the installation of all prerequisites, the LeanDESIGENER installation will start.

Tick “I agree” to accept EULA then click “Next”.

Press “Next” until the end of the procedure.


Click “Close” to end the installation.

To run LeanDESIGNER, double-click on the desktop icon.

Once the installation has ended, the login window of LeanDESIGENER will open: select language, type username and password, then click “Ok”.
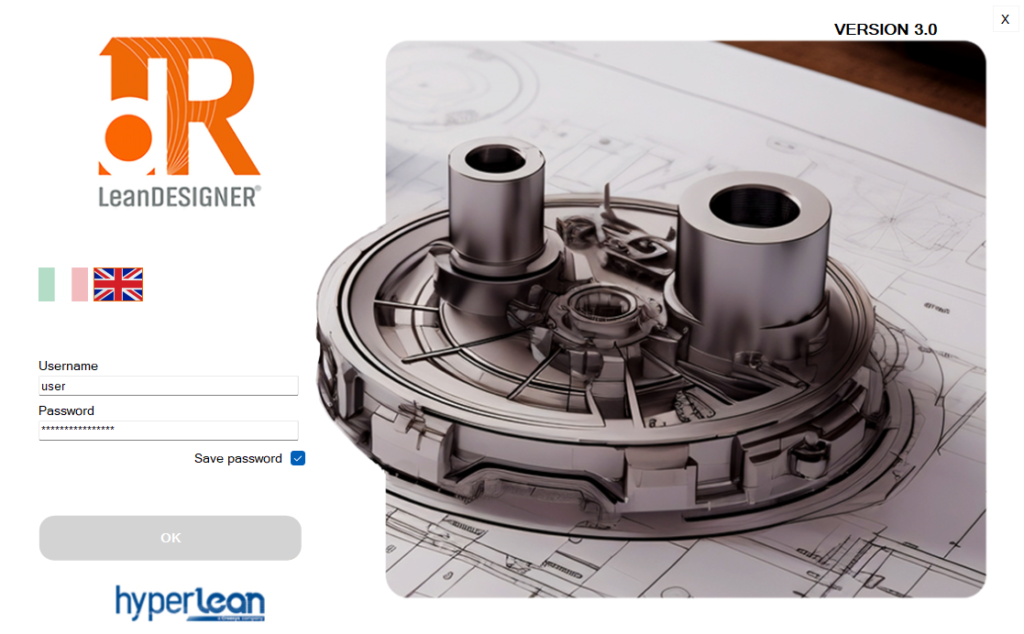
Wait for the LeanDESIGENER interface to open.
If you run into any problems, contact support@hyperlean.eu.