LeanCOST integration with NX
This guide shows how to enable the integration between LeanCOST EVO and NX.
For previous versions, contact the Hyperlean Support.
Introduction
There are two ways to connect LeanCOST and NX.

Based on your configuration, you could:
- Import a model from NX’s active session
- Open a native NX file directly in LeanCOST
This article describes how to configure your PC to enable both options.
1. Setting up environment variables
To ensure the communication between LeanCOST and NX system, it is necessary to check whether the environment variables UGII_BASE_DIR and UGII_ROOT_DIR are set with the correct values. Their values depend on the version of NX. The environment variables are:
- UGII_BASE_DIR = <NX Installation Path>
- UGII_ROOT_DIR = <NX Installation Path>\UGII\ (NX 9 & NX 10 only)
Note: from NX 11 and higher, the environment variable “UGII_ROOT_DIR” is not required anymore.
Examples:
- NX 9
UGII_BASE_DIR = “C:\Program Files\Siemens\NX 9.0”
UGII_ROOT_DIR = “C:\Program Files\Siemens\NX 9.0\UGII\”
- NX 10
UGII_BASE_DIR = “C:\Program Files\Siemens\NX 10.0”
UGII_ROOT_DIR = “C:\Program Files\Siemens\NX 10.0\UGII\”
- NX 11
UGII_BASE_DIR = “C:\Program Files\Siemens\NX 11.0”
- NX 12
UGII_BASE_DIR = “C:\Program Files\Siemens\NX 12.0”
- NX 1872
UGII_BASE_DIR = “C:\Program Files\Siemens\NX 1872”
- NX 1899
UGII_BASE_DIR = “C:\Program Files\Siemens\NX 1899”
- NX 1926
UGII_BASE_DIR = “C:\Program Files\Siemens\NX1926”
- NX 1953
UGII_BASE_DIR = “C:\Program Files\Siemens\NX1953”
- NX 1980
UGII_BASE_DIR = “C:\Program Files\Siemens\NX1980”
- NX 2007
UGII_BASE_DIR = “C:\Program Files\Siemens\NX2007”
- NX 2206
UGII_BASE_DIR = “C:\Program Files\Siemens\NX2206”
- NX 2212
UGII_BASE_DIR = “C:\Program Files\Siemens\NX2212” - NX 2306
UGII_BASE_DIR = “C:\Program Files\Siemens\NX2306” - NX 2312
UGII_BASE_DIR = “C:\Program Files\Siemens\NX2312” - NX 2406
UGII_BASE_DIR = “C:\Program Files\Siemens\NX2406”
If these environment variables are set up correctly, LeanCOST can open NX files with no additional procedure. You only need to have:
- a LeanCOST license that includes the CAD-Link module for NX
- NX installed (with an available license) in the PC where you want to open NX files with LeanCOST
The procedure to enable the import from active session is described in the following chapters.
2. Setting up the NX plugin
Download “LeanCostServer_1.1.x.zip” file from one of the following links according to the NX version you are using:
- NX11 or previous
https://www.dropbox.com/s/g36g0nwou3syvcn/LeanCostServer_1.1.1.zip?dl=0 - NX 12
https://www.dropbox.com/s/o80m9hioyzg2ch5/LeanCostServer_1.1.2.zip?dl=0 - NX 1872
https://www.dropbox.com/s/o9f48g0hvju9ok6/LeanCostServer_1.1.1872.zip?dl=0 - NX 1892
https://www.dropbox.com/s/ejlh1dz3d4tmdpu/LeanCostService%201.1.1899.zip?dl=0 - NX 1926, NX 1953, NX 1980, NX 2007 & NX 2206
https://www.dropbox.com/s/mccdqciu0y5b4zd/LeanCostService%201.1.1926.zip?dl=0 - NX 2212 & NX 2306
https://www.dropbox.com/s/yq6wueulhztu44x/LeanCostService_1.1.2212.zip?dl=0 - NX 2312
https://www.dropbox.com/scl/fi/8grx3e9x8lg43fljxiwt1/LeanCostService_1.1.2312.zip?rlkey=yzsjd73wc9klcycjjczb22cy4&dl=0
Unzip “LeanCostServer_1.1.x.zip” file and copy “LeanCostServer” folder, which is inside “LeanCostServer_1.1.x.zip” file, in a path that shall never be modified.
Companies that have other NX customizations or plugins, usually save them in the same directory. We recommend putting “LeanCostServer” folder in this directory.
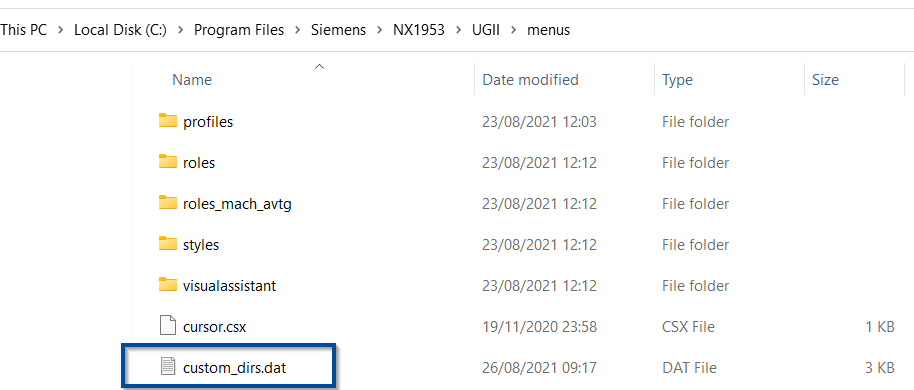
Open “<NX installation path>/UGII/menus”.
Copy “custom_dirs.dat” file and paste it on your desktop.
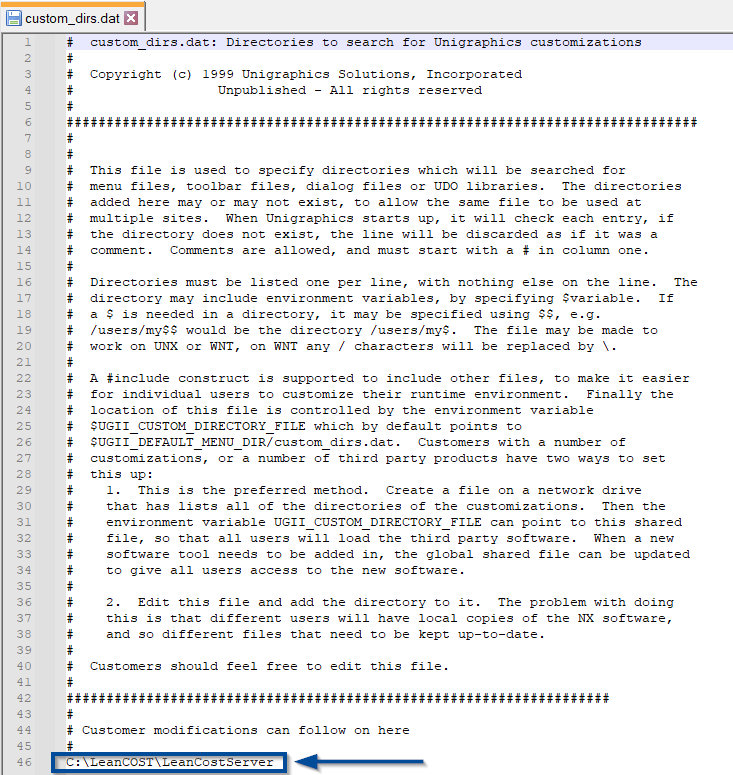
Open it with a text editor and add your “LeanCostServer” folder path at the end of the file.
Move the edited “custom_dirs.dat” file back in its original directory (“<NX installation path>/UGII/menus”) and replace the existing one.
The “LeanCostServer” folder contains two subfolders named “application” and “startup”.

The folder “startup” contains two files:
- the “dll” file of the plugin
- the “nx_options.xml” file

The port number used by the integration service is specified in the “nx_options.xml” file. The port number must be the same as the one specified in the LeanCOST “NxRemoteConnectionUri” option (see next chapter).

3. Configure the “options.xml”
The procedure to enable the integration with NX varies depending on the type of database used for LeanCOST. Follow the paragraph that matches your database type:
- Access database
- MsSQL database
Access database
To enable the import from NX, you need to edit the “options.xml” file in your access database that is stored inside the “ServerData<CustomerName>”.
To recover the path to the “ServerData<CustomerName>” folder, log in LeanCOST with a user with administrator rights.
From LeanCOST main screen, select the “Administrator” tab, then press “Server data tools” and select “Browse folder ServerData” from the context menu.

Click “Open”.

The “ServerData<CustomerName>” folder will open in a new File Explorer window: the “options.xml” file is stored in this folder.
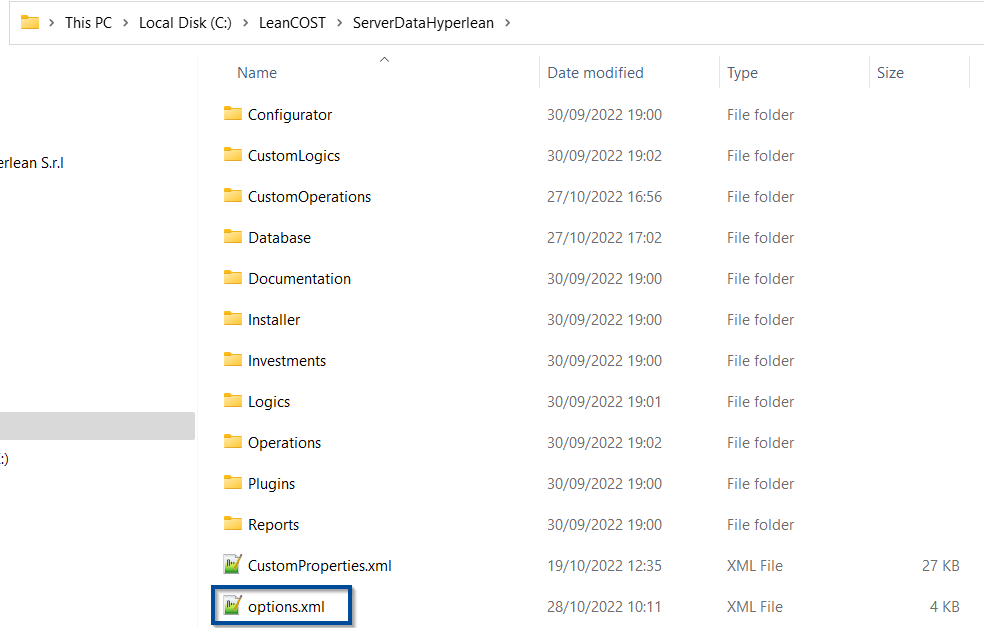
Open the “options.xml” file with a text editor and add the following strings, after all the others, but before the last “</options>” tag.
<!-- NX connection options -->
<NxRemoteConnectionUri>http://localhost:56789</NxRemoteConnectionUri> <!-- Uri for connecting to the active nx session if empty the usual connection is performed -->
<NxDefaultReferenceSet>SOLID</NxDefaultReferenceSet> <!-- Deafult reference set, used only when the active session is used at import -->
<NxArchitecture>x64</NxArchitecture> <!--NX installation architecture: x86 or x64 -->
Options details:
- NxRemoteConnectionUri –> address and port used by the NX connection service
If the NX installation folder is local, this address is given by the string “http://localhost” followed by port number, which must be the same of the port id in the options file in NX plugin (default value is “56789”). - NxDefaultReferenceSet –> the reference set for file loading.
If the company does not use specific reference set, this option can be left empty. - NxArchitecture –> indicates whether the NX installation is 32-bit (x86) or 64-bit (x64).
Save the file “options.xml”, close it and close LeanCOST: you can now restart LeanCOST to test the import form NX’s active session.
MsSQL database
To enable the import from NX, you need to edit the “options.xml” file in your MsSQL database that is stored in your SQL server.
To browse the database and edit its files, log in LeanCOST with a user with administrator rights.
From LeanCOST main screen, select the “Administrator” tab, then press “Server data tools” and select “Browse storage” from the context menu.

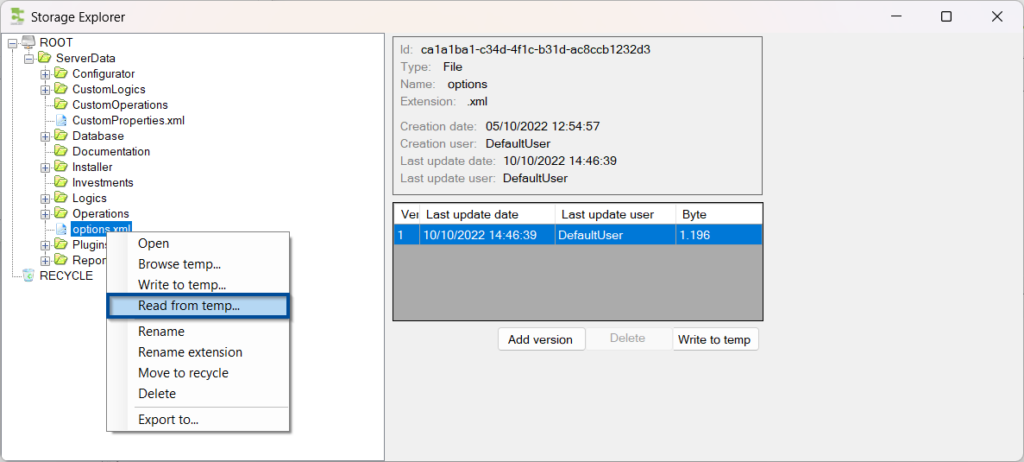
The window that opens, shown on next picture, represents the structure of the “LeanCOSTDB” database. Open the “ServerData” node, select the “options.xml” and right-click on it.
Select “Write to temp…” from the context menu.
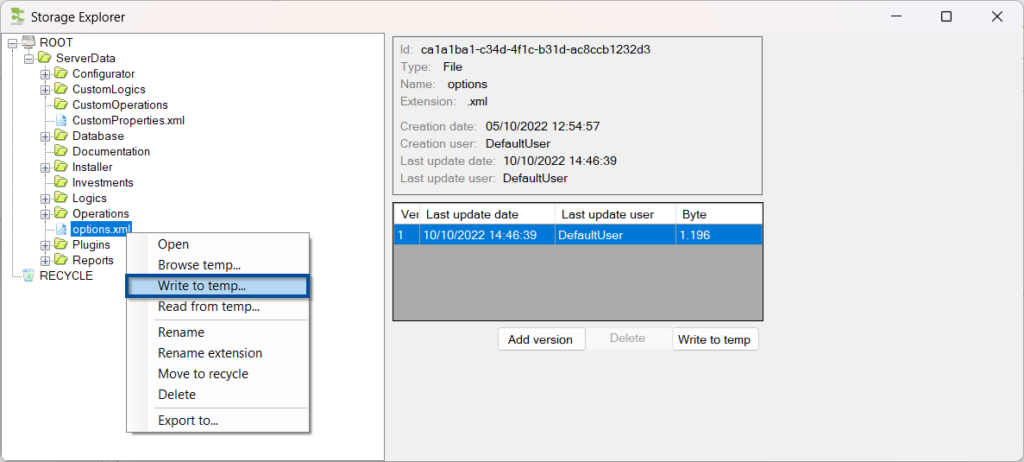
A new File Explorer window will open, showing the “options.xml” file inside the “Temp” folder.

Open the “options.xml” file with a text editor and add the following strings, after all the others, but before the last “</options>” tag.
<!-- NX connection options -->
<NxRemoteConnectionUri>http://localhost:56789</NxRemoteConnectionUri> <!-- Uri for connecting to the active nx session if empty the usual connection is performed -->
<NxDefaultReferenceSet>SOLID</NxDefaultReferenceSet> <!-- Deafult reference set, used only when the active session is used at import -->
<NxArchitecture>x64</NxArchitecture> <!--NX installation architecture: x86 or x64 -->
Options details:
- NxRemoteConnectionUri –> address and port used by the NX connection service
If the NX installation folder is local, this address is given by the string “http://localhost” followed by port number, which must be the same of the port id in the options file in NX plugin (default value is “56789”). - NxDefaultReferenceSet –> the reference set for file loading.
If the company does not use specific reference set, this option can be left empty. - NxArchitecture –> indicates whether the NX installation is 32-bit (x86) or 64-bit (x64).

Save the file “options.xml”, close the text editor and the folder “Temp”.
From the window “Storage Explorer”, select the “options.xml” and right-click on it. Select “Read from temp…” from the context menu.
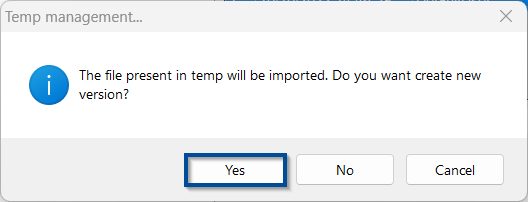
Press “Yes” on the message window that opens.
Close all windows and close LeanCOST: you can now restart LeanCOST to test the import form NX’s active session.
FAQ: Retrieve “.log” files in case of errors during file import
In case errors occur while importing, the Hyperlean support will ask you to share some log files generated by LeanCOST: these log files contain information about the error and are required to verify and solve the issue.
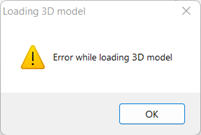
To recover the “.log” files generated by LeanCOST, follow the steps below:
- Try again to import the file that generates the error
- Open File Explorer
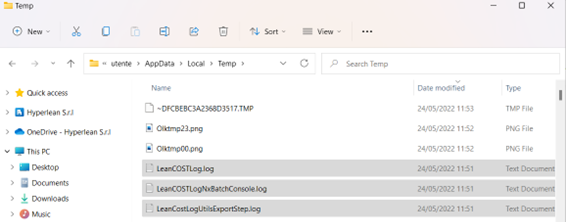
- Type “%temp%” in the navigation bar then, press “Enter”

- The “Temp” folder will open, here, list the files by date modified (most recent) and look for the following log files:
- LeanCOSTLog.log
- LeanCOSTLogNxBatchConsole.log
- LeanCostLogUtilsExportStep.log
- LeanCostServiceNxLog.log –> this one is generated only if the NX active session import is configured
Send all “.log” files to support@hyperlean.eu.